
Introduction
Note: As of v17.*, the batch options have changed.
Running STAR-CCM+® on Sabalcore Computing’s HPC Cloud Service is easy. You can run STAR-CCM+® interactively or in batch mode. You can even work with the GUI using the Sabalcore’s Remote Graphical Interface.
Sabalcore supports three licensing options for running STAR-CCM+®:
- Power On Demand
- Power Session – You can also use a power session license through a License Tunnel
- Dedicated license – Host your license on Sabalcore.
Sabalcore does not provide the license. Please contact your Siemens sales representative for more information on purchasing a license.
Before continuing, you should have an understanding of the compute clusters, how to setup and submit a job, and how to run a batch or interactive job.
In this article you will find:
- Run STAR-CCM+® Interactive Sessions via Remote desktop
- Run STAR-CCM+® Batch Jobs via the Command-line
- Connect the GUI to an already running Job
- STAR-CCM+® and Java process performance consideration
STAR-CCM+® Interactive Sessions via Remote Desktop
To run STAR-CCM+® in graphical mode follow these simple steps.
Upload your sim files and open a Remote desktop session.
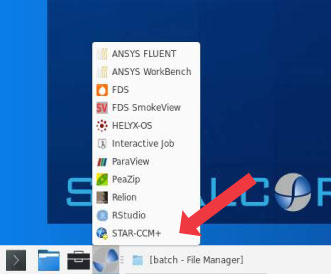
Select STAR-CCM+® from the Sabalcore menu (located at the bottom of the screen) . The Launcher will appear.
Choose the the node type, number of nodes and the number of cores per node. This is already filled in by default but should be modified to suit your needs.
Enter your Power-On-Demand license key. Select the check box if you want your key saved to your account profile. Once it’s saved, you do not have to re-enter the key for interactive OR batch jobs.
Click “OK”
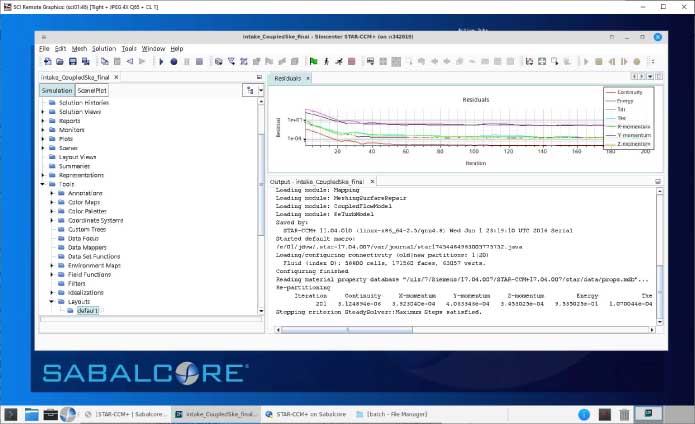
After a few moments the STAR-CCM+ GUI should be visible. The system will automatically configure the execution nodes so there is no need to specify a hostfile.

STAR-CCM+® Batch Jobs via the Command-line
To run STAR-CCM+® in batch mode from the command-line create a pbs file with the necessary parameters. You can copy and past this example into a text file to edit. This example specifies 128 cores on the onyx cluster.
#PBS -l nodes=8:onyx:ppn=16
# Add the latest version of STAR-CCM+ to your run-time environment.
module load starccm
# Put your Power-On-Demand license key here.
export LM_PROJECT=QXXXVVVXXX
# Change to your working directory where you sim file is located
cd $PBS_O_WORKDIR
# Start starccm versions prior to v17
# starccm+ -power -mpi openmpi -fabric UCX -xsystemlibfabric -xsystemucx -batch model.sim

# Start starccm+ with the machinefile for version v17+
starccm+ -power -mpi openmpi -fabric IBV -machinefile machinefile -np $NP -batch myfile.sim
Save the script, e.g. starccm_run.pbs
Submit the job to the cluster:
[user@sci ~]$ qsub starccm_run.pbs
Use the “qstat” command to view your job’s current status.
[user@sci ~]$ qstat
Job id         Name                User           Time Use S  Queue
------------------------- ---------------- ------ -------- - -----
306417.jman    starccm_run         user           00:00:18 R dque
Connect the GUI to an already running Job
You can connect the GUI to a running batch job. After your batch job has started, you will need to use the “qstat -n” command to determine the head node for the job. The first node in the list is the job’s head node. For example:
[user@sci ~]$ qstat -n 574693.jman

jman:
Job ID      Username Queue Jobname SessID NDS TSK Memory Time S Time Req'd Req'd Elap
----------------------- ----------- -------- ---------------- ------ ----- ------ ---
574693.jman USER     dque   star.pbs   0      2    8 -- --       R           00:00:00
 n824006/0+n824006/1+n824006/2+n824006/3+n824005/0+n824005/1+n824005/2+n824005/3
This indicates that n824006 is the head node of this job.
Then open a new interactive STAR-CCM+ job. When the STAR-CCM+ GUI starts, select File -> Connect to server. Then enter the hostname of the head node (e.g. n824006) in the “Host” field. Then the “Scan ” to the right of the host field. It should say “One server found running on [head node]”. Finally click on “OK” to connect.
STAR-CCM+® and Java Process Performance Issue
In some cases, StarCCM+ runs an extra Java process on the head node of the job. The Java process could use a significant portion of one of the processor cores which is also running a STAR-CCM+ process and will slow it down, which in turn, will slow the whole job. To counter this, dedicate 1 core on the head node of the job for the Java process. For example, a job that uses 48 cores, 47 will be used for starccm+ and 1 will be used for Java. Here’s an example PBS script that does just that:
#PBS -l nodes=2:ppn=24:copper
#PBS -l nodes+=3:ppn=16:onyx
#PBS -l nodes++=4:ppn=12:red

# Add the latest version of STAR-CCM+ to your run-time environment.
module load starccm

# Put your Power-On-Demand license key here.
export LM_PROJECT=XXXYYYZZZ

# Change to your working directory and start STAR-CCM+
cd $PBS_O_WORKDIR

# Create a machinefile with N-1 hostname (reserves 1 core for java, do not edit)
tail -n +2 $PBS_NODEFILE > machinefile

# Count the number of worker processes (do not edit)
NP=$(cat machinefile | wc -l)

# Start starccm+ with the machinefile prior to v17
#starccm+ -power -mpi openmpi -fabric UCX -xsystemlibfabric -xsystemucx -machinefile machinefile -np $NP -batch myfile.sim

# Start starccm+ with the machinefile for version v17+
starccm+ -power -mpi openmpi -fabric IBV -machinefile machinefile -np $NP -batch myfile.sim